What are children interested in?
When it came to thinking about designs for my print books, I realised that I don't really know how to make it child friendly or something for children to engage with. I haven't read a children's book since I was really young, so it's hard to think of what excited me back then!
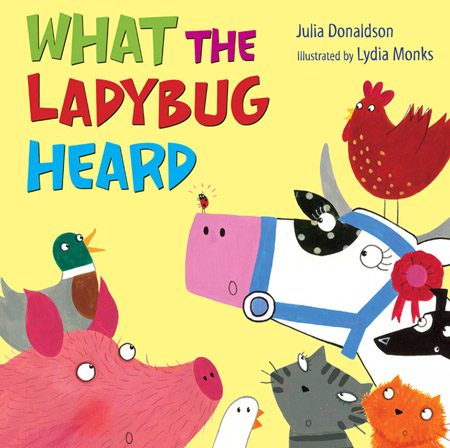
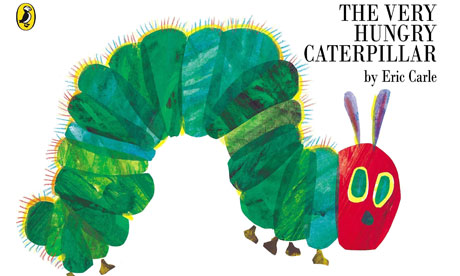
I decided to look at children's book covers online to see how they were designed aesthetically...
After looking at a few children's story book covers online, I came to the conclusion that kids like their book covers to be visual. A child is more likely to want to read a story full of pictures / illustrations and colour, than something full of blocks of text as they don't have such a long attention span. The titles of the books are often very short, some being only one word. This will be due to the fact that children are still learning to read, so won't want to pick up a book if it the title had more than 5 words in it.
When it comes to designing my print books, I'm definitely going to have to include illustrations more than text. Could the book be designed in a similar way to IKEA instruction booklets?
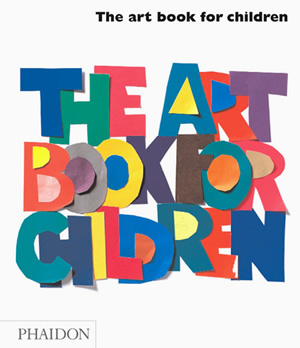
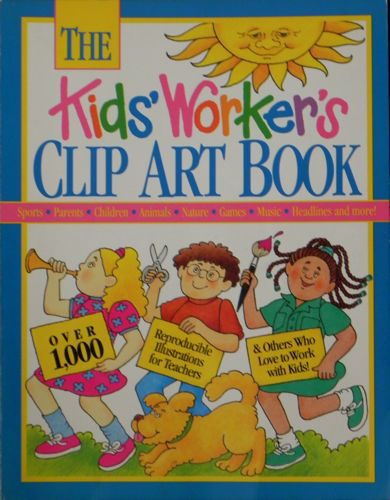
I decided to look into art books aimed at children, to see how they differ to book covers for story books...
When it came to looking at art books aimed at children, I found that they were designed quite similarly to story books, in the idea that every book cover was covered in colourful images to attract the child's attention. It seemed that the more colours used, the better when it came to art books. I also noticed that a lot of art book covers were covered in illustrations that looked as though they could have been drawn by the children themselves, for example the scruffy bees and flowers drawn on Usborne's "My Very First Art Book".
When it comes to designing my print books, I definitely think that illustration and visuals are important for young children. It needs to be colourful, fun and engaging. It can't be too hard to understand yet there needs to be enough text in the book so that they can follow along and know how to produce prints, as the children are bound to have their parents joining in with them so text and reading shouldn't be an issue.
The colour scheme is going to have to be bright and bold - kids love primary colours!
Found some useful websites with ideas of printmaking for children:
Some type of prints to consider:
This is a great printmaking lessons for very active kids. Best done outdoors in the warm weather.
What you need:
- Paper (a nice big roll of paper, if you can get it)
- Thin paint. (This can be water-based paint of any kind. If you use tempera or acrylic, make sure to add lots of water so the paint is very, very thin.)
- Containers for paint
- Tennis balls
- Aprons or old shirts
What you do:
Children should wear an apron or old shirt.
Dip the tennis balls in paint.
Dab or (our favorite) drop the balls onto paper to make a print.
Hang the prints to dry.
Some dripping may occur, which adds interest to the finished work.
Children should wear an apron or old shirt.
Dip the tennis balls in paint.
Dab or (our favorite) drop the balls onto paper to make a print.
Hang the prints to dry.
Some dripping may occur, which adds interest to the finished work.
SNOW FLAKE PRINTS
You can create prints that look like snowflakes by using old strawberry baskets
What You Need:
- small vegetable or fruit baskets - one per every 3 children is best
- washable white glue
- glitter
- sturdy paper (dark color)
- plastic swallow pans or trays
What You Do:
Discuss the linear quality of the baskets.
With help of teacher, children cut out a circle from the bottom of the fruit basket. (The type which has a radiating pattern is best.)
You should end up with a "snowflake template".
Dip the template into glue in a tray.
Help child lightly and gently stamp glue covered template onto paper. There should be a glue print left on the paper.
Sprinkle glitter over glue "print".
Shake excess glitter off.
Allow to dry.
Extend by writing about snow, winter, Christmas memories, etc.
STYROFOAM RELIEF PRINTING / POLYBLOCK PRINTING
A form of relief printing that makes use of readily available styrofoam meat and vegetable trays.
What You Need:
- Paint or ink.
- Styrofoam meat trays.
- Scissors.
- Pencils.
- Paper.
- Soft rubber brayers (printing rollers that can be found at art supply stores). You can substitute small paint rollers, or a spoon if rollers aren't readily available.
- An old cookie tray or a piece of plexiglass to roll the ink out on.
What You Do:
First cut the edges off of the trays so that you have a flat surface to work on.
Next, draw an image onto the tray using a pencil.
Remember, your printed image will appear in reverse!
Follow the printing with a brayer directions.
(found on the Printmaking 102 page) You could instead use a paintbrush to cover over the styrofoam with paint or ink, lay the paper overtop, press lightly and voila.
Repeat until you have an edition of prints.

MONOPRINTING WITH FOIL
What You Need:
- foil
- tempera paint
- brushes (any size will do but the larger the better)
- 12x18 white paper
- paper plates
- water
What You Do:
Have foil precut down into sheets a little bigger than the paper you will be using.
Students then paint a picture quickly onto the foil making sure the paint application is thick so that it does not dry too quickly.
When design is complete, place paper on top of paint and pat or gently rub on back of paper to get the paint to adhere to the paper.
Remove.
The result is a monoprint.
Note from Stacey: This can be modified for any grade level. I have done this with my severely disabled students. We changed it by having them only use two colors (primary colors), the result of course making a secondary color and not resulting in a puddle of mud. As an option, after the student has painted the entire piece of foil, place their hands onto the paint for a handprint. Then repeat paper application as done above remove to reveal the masterpiece. You can also randomly paint and then have the kids use their fingers to draw a picture in the paint.
MONOPRINTING WITH PLEXIGLASS
Students will learn how to make monoprints. Monoprinting is a process whereby only one print is pulled from the printing plate.
What You Need:
- Printmaking ink (for older kids - if you have it) or a water-based paint. (Acrylic or tempera).
- Paintbrushes.
- Sheets of plexiglass (approx 12"x12") You can sometimes find plexiglass for next to nothing at your local lumber yard or hardware store. Just ask for the offcuts they normally throw away. You can also use old garage sale signs (the plastic ones) for this activity.OR
- Styrofoam trays (veggie or meat trays)
- Paper.
- A covered work area.
- Optional: Soft rubber brayer or small paint roller.
- Popsicle stick or pencil with eraser.
What You Do:
Using the brayer, roll ink out onto the plexiglass, covering it completely.
Using the end of a pencil or a popsicle stick, draw an image on the plexiglass.
Place paper on plexi and rub lightly.
Peel away paper.
Method # 1B
Using the brayer, roll ink onto the plexiglass, covering it completely.
Place paper over plexiglass.
Using a pencil, draw an image on the paper.
When you peel away the paper, the image will have transferred itself.
This is very similar to using carbon paper.
Using the brayer, roll ink onto the plexiglass, covering it completely.
Place paper over plexiglass.
Using a pencil, draw an image on the paper.
When you peel away the paper, the image will have transferred itself.
This is very similar to using carbon paper.
Method # 2
Using your paintbrush, paint a design onto the plexiglass using as many or as few colours as you like. Work quickly ... don't let the paint dry!
Place paper over the plexiglass and rub lightly with the palm of your hand.
Peel away paper.
Sign your work.
Using your paintbrush, paint a design onto the plexiglass using as many or as few colours as you like. Work quickly ... don't let the paint dry!
Place paper over the plexiglass and rub lightly with the palm of your hand.
Peel away paper.
Sign your work.
Method # 3
Prepare your paints. Start with primary colors (red, yellow and blue) and from there, mix our secondary colors (orange, violet and green).
Using a pencil, "carve" lines into the foam (or leave the foam as it is).
Begin adding paint to the printing plate.
When the paint has been applied, lay a sheet of paper over the painted plate.
Rub your hands over the paper, carefully.
Lift the paper to reveal the completed print.
Using a pencil, "carve" lines into the foam (or leave the foam as it is).
Begin adding paint to the printing plate.
When the paint has been applied, lay a sheet of paper over the painted plate.
Rub your hands over the paper, carefully.
Lift the paper to reveal the completed print.
YARN / ROPE PRINTS
Students will use yarn to create a stamp for printmaking.
What You Need:
- scissors
- glue
- yarn
- cardboard or oaktag
- paper
- printing ink or paint
- crayons
What You Do:
On one piece of cardboard, have your students use crayons to draw an underwater scene. At this point, they do not draw in a fish.
On another piece of cardboard or oak tag, have your students draw a fish.
Then, have your students outline the fish with glue. Then, they should apply yarn to the glue.
Let the yarn and glue dry.
Students then apply printing ink (or paint) to the yarn fish and then press the fish onto the underwater scene to create a print.
MUFFIN TIN PRINTING
First we cut out our snowflakes.
On one piece of cardboard, have your students use crayons to draw an underwater scene. At this point, they do not draw in a fish.
On another piece of cardboard or oak tag, have your students draw a fish.
Then, have your students outline the fish with glue. Then, they should apply yarn to the glue.
Let the yarn and glue dry.
Students then apply printing ink (or paint) to the yarn fish and then press the fish onto the underwater scene to create a print.
MUFFIN TIN PRINTING
BUBBLE WRAP FINGER PRINTING
MIRRORED STRING PAINTING
What you need:
- yarn / string
- poster paint / acrylics
- folded pieces of paper
- bowls
What you do:
Pour colours of paint into bowls, ready for dipping.
Dip the yarn or string into the paints so that it is covered in paint, then lay out on one half of the paper in whatever pattern you want.
Fold the paper in half and press down with your hands, this creates a mirrored print.
Example:
MIXED MEDIA LEAF, FINGER AND TAPE PRINTING
What you need:
- masking tape / brown tape
- ink pads for stamping / poster paint
- paper
- sage leaves / small leaves
- PVA
What you do:
Stick down the tape onto the paper to create the trunk and branches of the tree.
Press your finger / leaf (your choice) into the paint or ink stamp and press onto the paper where you want the leaves to go.
You can stick down the leaves onto the page as well with PVA to create a mixed media affect.
You could use any leaves or even flowers when printing, and don't necessarily need to print around the shape of the tree.
FABRIC LEAF PRINTING
SNOWFLAKE PRINTS USING TISSUE PAPER
Then we set a tissue paper snowflake on a sheet of watercolor paper (any heavier paper would work) and used a spray bottle of water to wet it evenly.
We also used a foam brush to press the wet tissue paper down, so that as much of the snowflake was in contact with the paper as possible.
Then we let the snowflake dry on the paper before removing it. Not necessary, but we wanted as much color transfer as possible.
SPONGE PRINTING
What you need:
- sponges
- paint
- scissors
What you do:
Cut the sponges out into shapes (with an adult) that you want to use, for example hearts, circles, triangles, stars, etc
Cover the sponge in paint and then press onto the paper in whatever pattern you want.
Simple as that!
OTHER USEFUL ITEMS YOU COULD USE TO PRINT
- cookie cutters - for outlines of shapes, could even be complex shapes
- toilet roll tubes - for circle outlines
- fingers
- hands and feet
- bubbles
- balls
- shop bought stamps
- toy car wheels
- household tools - bottle caps, potato mashers, wood scraps, corks, etc
- moulding clay and toothpicks for drawing into the clay
- rubbers carved into shapes for stamps
- use stencils with sponges
- baggy painting - paper shapes in a sealable bag with paint in there, then squish the paint about with the plastic bag closed


